How to Choose the Best Studio Monitors for Home Recording Studios
Creating a home recording studio has become more accessible than ever. Musicians, producers, podcasters, and content creators can now produce professional-quality recordings without leaving their homes. Yet, while microphones, audio interfaces, and DAWs often receive the most attention, one piece of equipment quietly determines the overall quality of your mixes: studio monitors.
Studio monitors are not the same as ordinary speakers. They are designed to reproduce sound as accurately and transparently as possible. This accuracy allows producers and engineers to hear the real details of their recordings and make better mixing decisions. Choosing the right monitors for a home studio, however, is not always straightforward. Size, room acoustics, frequency response, connectivity, and budget all play important roles.
If you’re building or upgrading your home recording setup, understanding how to choose the best studio monitors can make a dramatic difference in your sound quality and workflow.
Understanding What Studio Monitors Actually Do
Before selecting a pair of monitors, it helps to understand their purpose. Studio monitors are built for accuracy rather than entertainment. Consumer speakers often enhance bass or treble to make music sound more exciting, but studio monitors aim for a flat frequency response.
A flat response means the speaker reproduces sound without boosting or cutting certain frequencies. This neutrality is essential because it helps producers hear the true balance of a mix. If the monitors exaggerate bass, for example, you might reduce bass in your mix too much. When played on other systems, the track could sound thin.
Studio monitors are therefore critical tools for mixing and mastering. They reveal details such as subtle background noise, vocal clarity, stereo imaging, and dynamic balance that ordinary speakers might hide.
For anyone serious about producing music at home, investing in reliable monitors is not a luxury. It is a necessity.
Why Studio Monitors Matter in Home Recording Studios
In a professional studio environment, engineers rely on accurate monitoring to make precise adjustments to recordings. The same principle applies to home studios. Without proper monitoring, your mixes might sound good in your room but fail when played in a car, on headphones, or on streaming platforms.
Studio monitors help you achieve translation. Translation refers to how well your mix sounds across different playback systems. The better your monitors represent the true sound of your mix, the easier it becomes to create tracks that translate well everywhere.
Good monitors also reduce ear fatigue. Many consumer speakers emphasize certain frequencies that become tiring during long mixing sessions. High-quality studio monitors are designed for extended listening, making them ideal for producers who spend hours editing and mixing audio.
Key Factors to Consider When Choosing Studio Monitors
Selecting the right studio monitors involves several technical and practical considerations. Let’s explore the most important ones.
1. Room Size and Monitor Size
One of the biggest mistakes beginners make is buying monitors that are too large for their space. Bigger monitors produce deeper bass and higher output, but they also require more room to perform properly.
In smaller home studios, monitors with 5-inch woofers are often the best choice. They provide balanced sound without overwhelming the room with low frequencies.
Medium-sized rooms may benefit from 6- or 7-inch monitors, while larger rooms can accommodate 8-inch monitors or larger. Choosing a monitor that matches your room size helps maintain accurate bass response and prevents acoustic issues.
2. Active vs Passive Studio Monitors
Studio monitors come in two main types: active and passive.
Active monitors include built-in amplifiers. Each speaker has its own power source and is designed to work perfectly with its internal amplifier. This configuration simplifies setup and ensures optimal performance.
Passive monitors, on the other hand, require an external amplifier. While they offer flexibility for professional studios, they are less common in home recording setups because they require additional equipment and configuration.
Most home producers prefer active monitors because they are convenient, efficient, and easier to integrate with modern audio interfaces.
3. Frequency Response and Accuracy
Frequency response indicates the range of frequencies a monitor can reproduce. Human hearing typically ranges from 20 Hz to 20 kHz, but most studio monitors focus on the most critical musical frequencies.
A monitor with a wide and balanced frequency response allows you to hear both deep bass and detailed highs. However, accuracy matters more than range. A monitor that reproduces frequencies evenly will help you create better mixes than one that simply claims an extended range.
Pay attention to reviews and technical specifications that mention flat response or neutral sound characteristics.
4. Connectivity Options
Modern studio monitors include a variety of input options. The most common connections include:
- XLR
- TRS (balanced quarter-inch)
- RCA (unbalanced)
Balanced connections like XLR and TRS are preferred because they reduce noise and interference. If your audio interface supports balanced outputs, choosing monitors with balanced inputs will improve audio clarity.
Compatibility between your monitors and audio interface is essential for optimal performance.
5. Where to Buy Studio Monitors
When selecting equipment for your home studio, buying from reliable sources is just as important as choosing the right model. Many musicians and producers prefer to Buy Studio Monitors in USA from trusted retailers and professional audio suppliers because they often provide genuine products, warranties, and expert customer support.
Online music gear stores, professional audio retailers, and well-known marketplaces typically offer a wide selection of studio monitors for different budgets and needs. Reading verified reviews and comparing specifications can help you find the best option for your setup.
Understanding Monitor Components
Studio monitors contain several internal components that influence sound quality. Understanding these parts can help you make a more informed choice.
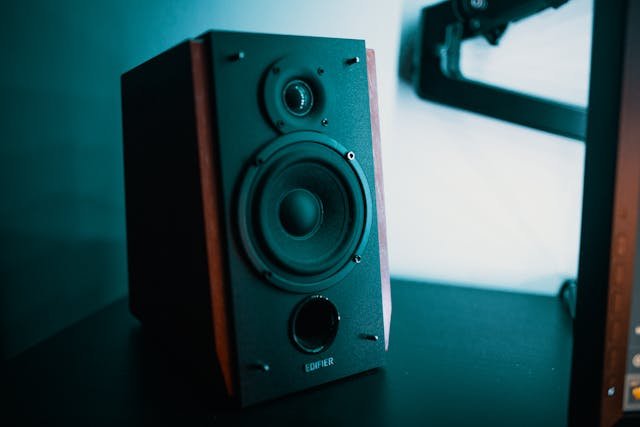
Woofers
The woofer handles low and mid-range frequencies. Larger woofers typically produce deeper bass, which is why 8-inch monitors are popular for bass-heavy music genres like EDM and hip-hop.
However, larger woofers also require more room space to perform correctly.
Tweeters
Tweeters reproduce high frequencies such as vocals, cymbals, and acoustic details. High-quality tweeters provide clear and smooth high-end response without harshness.
Some studio monitors use ribbon tweeters, which are known for detailed and precise high-frequency reproduction.
Amplifiers
Active monitors include built-in amplifiers that power the woofer and tweeter. Many monitors use bi-amplification, meaning each driver has its own dedicated amplifier. This design improves clarity and efficiency.
Room Acoustics and Monitor Placement
Even the best studio monitors cannot perform properly in a poorly treated room. Room acoustics significantly influence how you hear sound.
Hard surfaces like walls and desks reflect sound waves, creating echoes and frequency buildup. These reflections can distort the accuracy of your monitors.
Basic acoustic treatment can dramatically improve monitoring accuracy. Some effective solutions include:
- Acoustic foam panels
- Bass traps in room corners
- Diffusers for sound scattering
- Isolation pads under monitors
Placement is equally important. Studio monitors should form an equilateral triangle with your listening position. This means the distance between the monitors should match the distance between each monitor and your ears.
Additionally, tweeters should be positioned at ear level for the most accurate sound.
Nearfield vs Midfield Monitors
Most home studios use nearfield monitors. These monitors are designed to be placed close to the listener, usually about 3 to 5 feet away.
Nearfield monitors minimize the influence of room reflections, allowing producers to hear a more direct and accurate sound.
Midfield monitors, by contrast, are used in larger studios where the listener sits farther from the speakers. They provide higher output and wider coverage but are rarely necessary for small home studios.
Budget Considerations
Studio monitors are available across a wide range of price points. While it may be tempting to choose the cheapest option, investing in reliable monitors is worthwhile.
Entry-level monitors can still deliver good results for beginners, especially when paired with proper room treatment.
Mid-range monitors often provide better clarity, improved build quality, and more accurate frequency response.
High-end monitors offer exceptional precision and are commonly used in professional studios. However, many home producers can achieve excellent mixes with well-chosen mid-range monitors.
Ultimately, your budget should balance quality, room size, and long-term studio goals.
Popular Studio Monitor Brands
Several brands are widely respected in the audio industry for producing reliable studio monitors.
Some well-known names include:
- Yamaha
- KRK
- JBL
- Adam Audio
- PreSonus
- Focal
- Kali Audio
Each brand offers different sound characteristics. Some monitors emphasize analytical precision, while others provide slightly warmer tones.
Testing monitors in person, when possible, helps determine which sound profile suits your preferences.
Additional Features to Look For
Modern studio monitors often include features designed to improve flexibility and performance.
Room Control EQ
Some monitors include adjustable EQ switches that help compensate for room acoustics. These controls allow you to reduce bass buildup or adjust high frequencies depending on monitor placement.
Front vs Rear Bass Ports
Bass ports help extend low-frequency response. Monitors with rear ports may require additional distance from the wall, while front-ported monitors are often easier to place in smaller rooms.
Auto Standby Mode
Some monitors automatically enter standby mode when not in use, saving energy and extending component life.
Using Reference Tracks
Once you have your studio monitors set up, it is important to learn how they sound. One of the best ways to do this is by using reference tracks.
Reference tracks are professionally mixed songs that you know well. By listening to them on your monitors, you can understand how balanced mixes should sound in your room.
Compare your own mixes to reference tracks regularly. This practice helps improve mixing decisions and ensures your music translates well to other playback systems.
When to Add a Subwoofer
Subwoofers extend low-frequency response below what most studio monitors can reproduce. They are particularly useful for music genres with deep bass, such as EDM, hip-hop, and cinematic sound design.
However, adding a subwoofer requires careful calibration. Without proper setup, it can create more problems than benefits.
In small home studios, many producers prefer using monitors with larger woofers instead of adding a subwoofer.
Common Mistakes When Buying Studio Monitors
Many beginners make similar mistakes when choosing monitors. Avoiding these pitfalls can save time and money.
One common mistake is prioritizing loudness over accuracy. Studio monitors should reveal details, not simply play loudly.
Another mistake is ignoring room acoustics. Even expensive monitors can sound poor in untreated rooms.
Finally, some buyers focus too heavily on brand reputation without considering their specific needs and room size.
Taking the time to research and compare options leads to better long-term results.
Final Thoughts
Choosing the best studio monitors for a home recording studio requires thoughtful consideration of multiple factors. Room size, monitor type, frequency response, connectivity, and budget all influence the final decision.
Accurate monitoring is one of the most important investments a producer can make. The right monitors help you hear your music clearly, make confident mixing decisions, and create recordings that translate well across different listening environments.
Whether you are building your first home studio or upgrading an existing setup, selecting reliable studio monitors will significantly improve your production workflow and audio quality.
By understanding the technical aspects of monitors, optimizing your room acoustics, and choosing equipment that suits your environment, you can create a monitoring system that supports professional-level music production from the comfort of your home studio.